 |
1 |
From the home screen of the PDQ (Paymentsense logo showing), press the down button |
 |
2 |
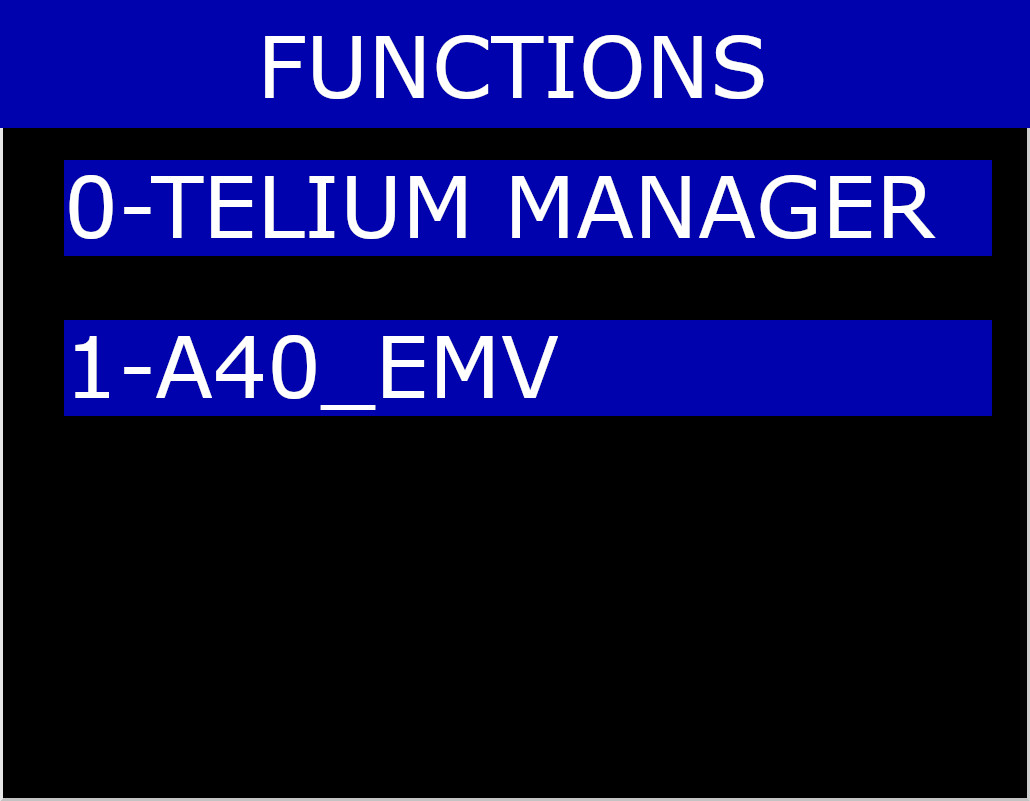
Select TELIUM MANAGER and press ENTER |
 |
3 |
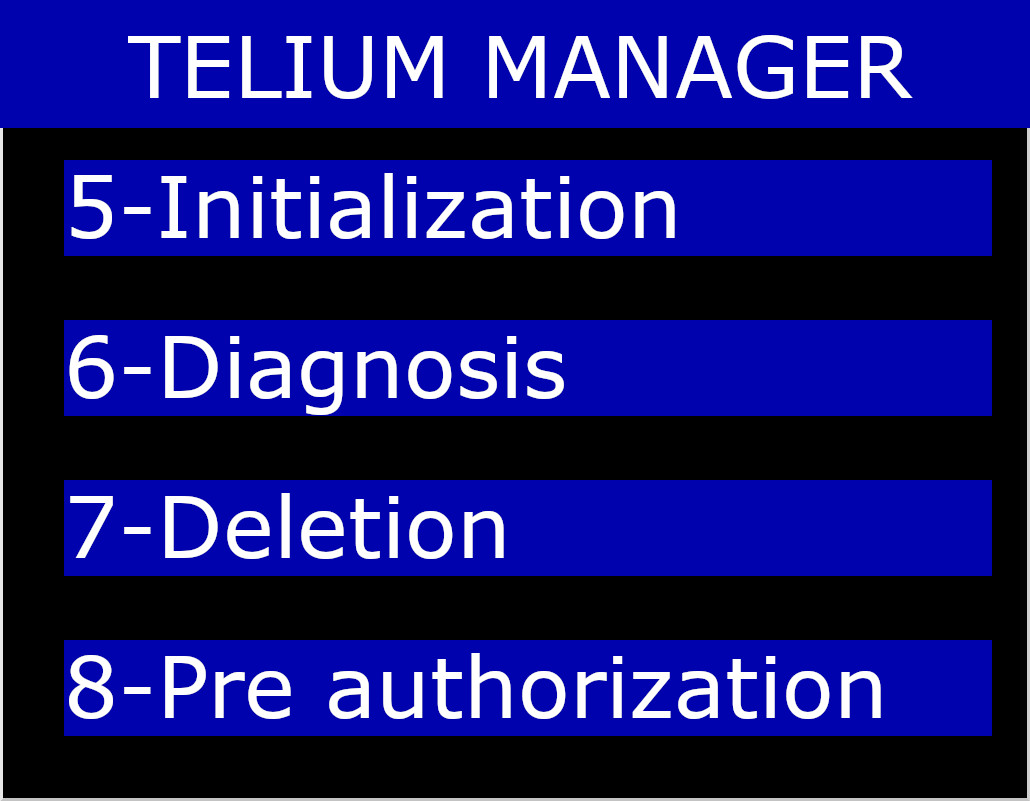
Select Initialization and press ENTER |
 |
4 |
Select Hardware and press ENTER |
 |
5 |
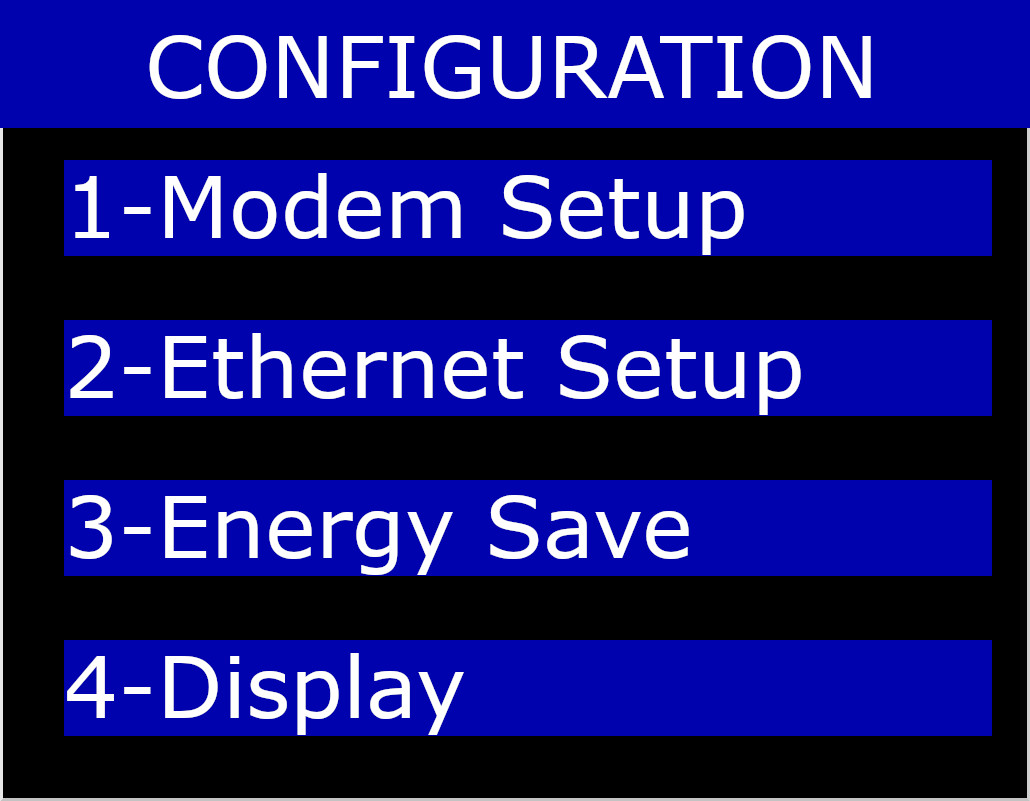
Select Ethernet Setup and press ENTER |
 |
6 |
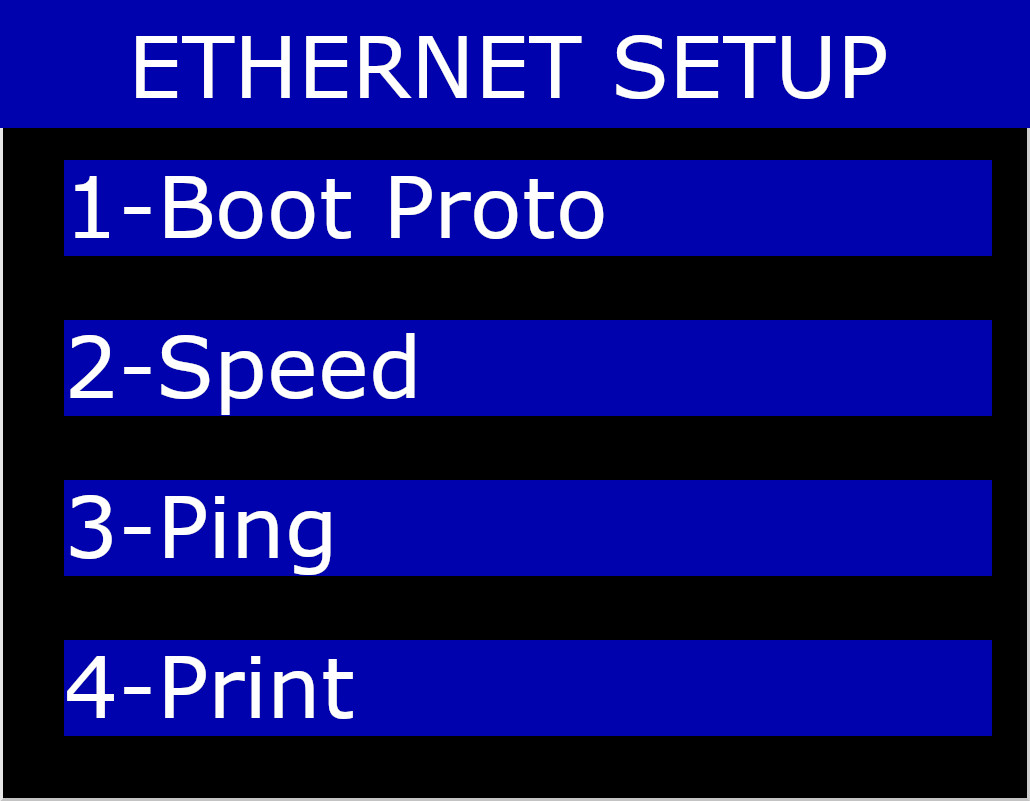
Select Boot Proto and press ENTER |
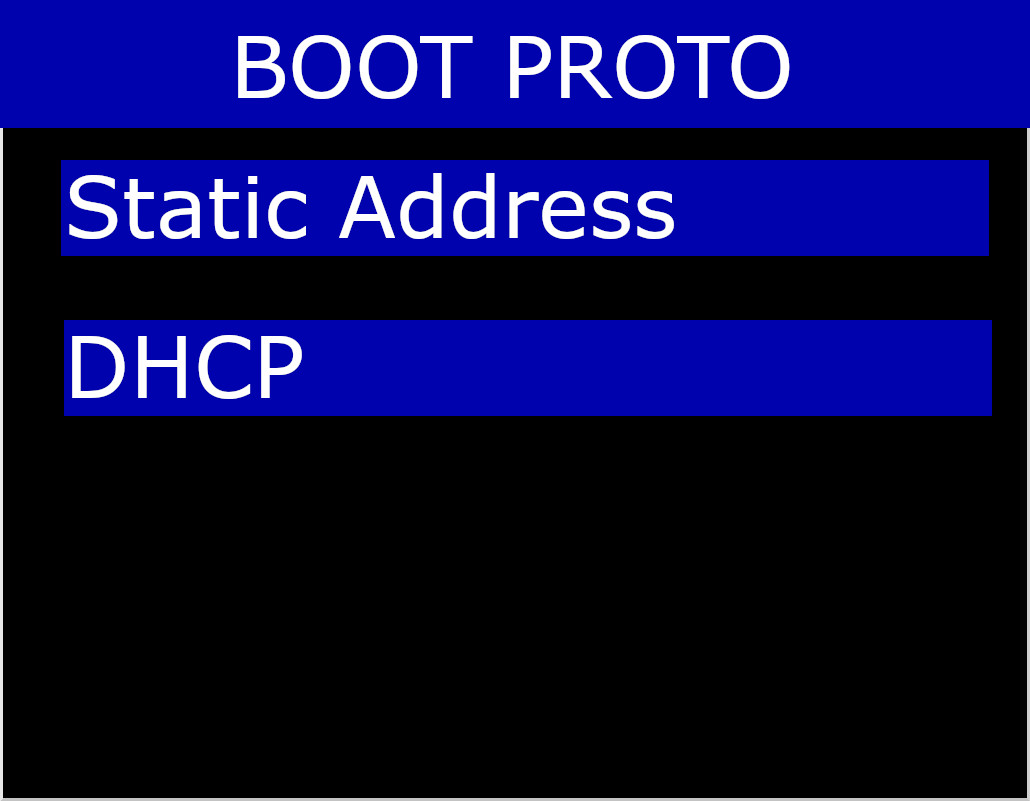 |
7 |
Select Static Address and press ENTER |
 |
8 |
Select IP Address and press ENTER |
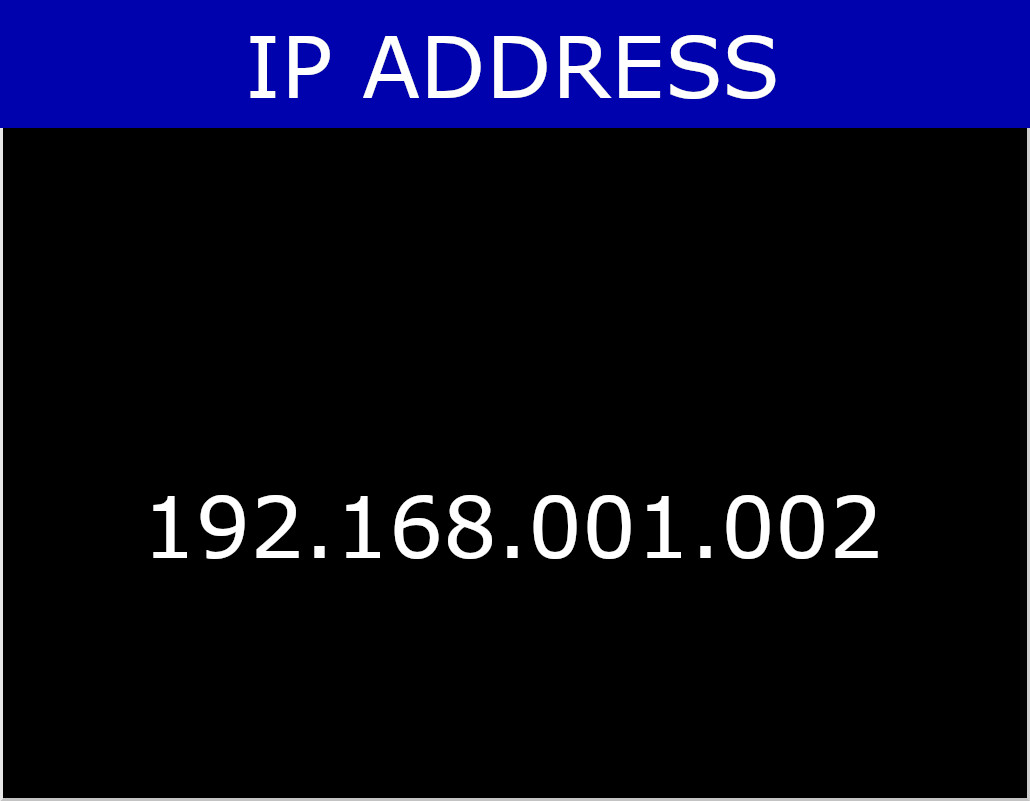 |
9 |
Enter the static IP that you wish to use and press ENTER |
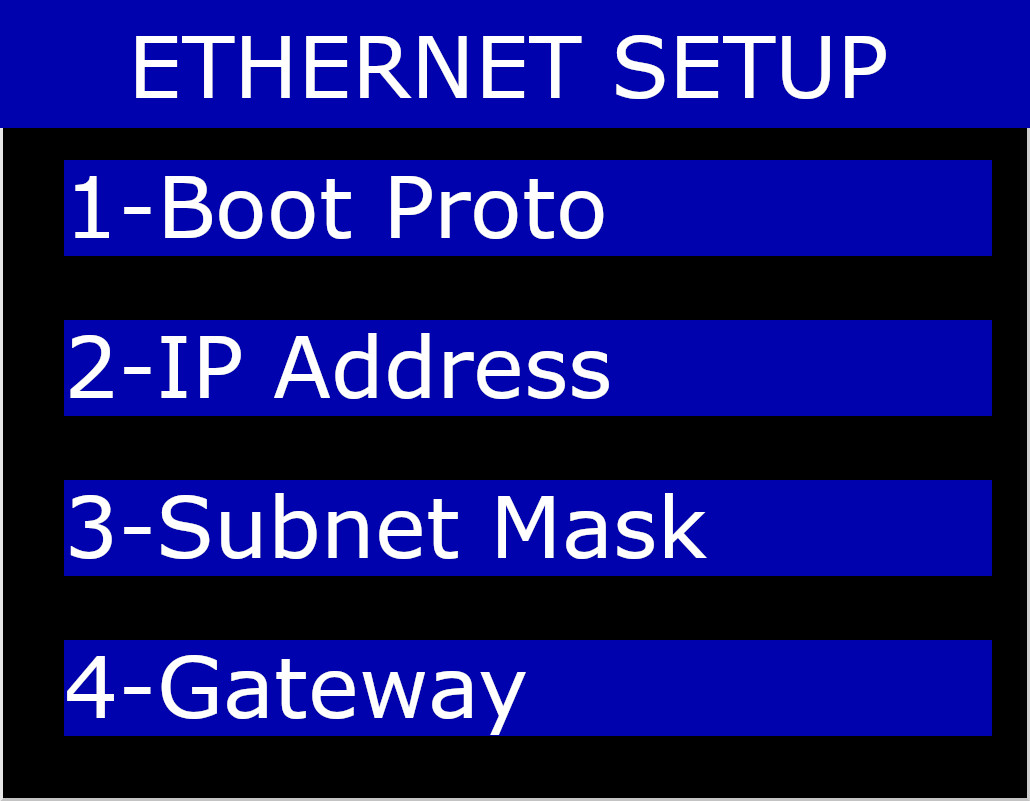 |
10 |
Select Subnet Mask and press ENTER |
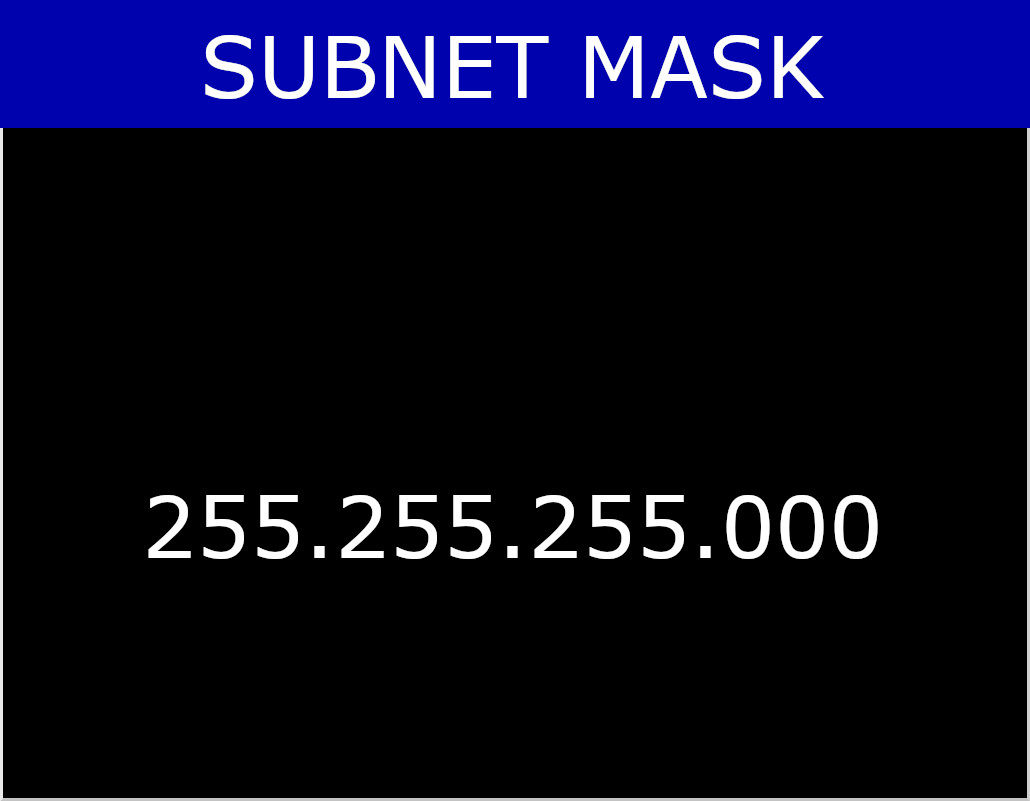 |
11 |
Enter the mask that you wish to use and press ENTER |
 |
12 |
Select Gateway and press ENTER |
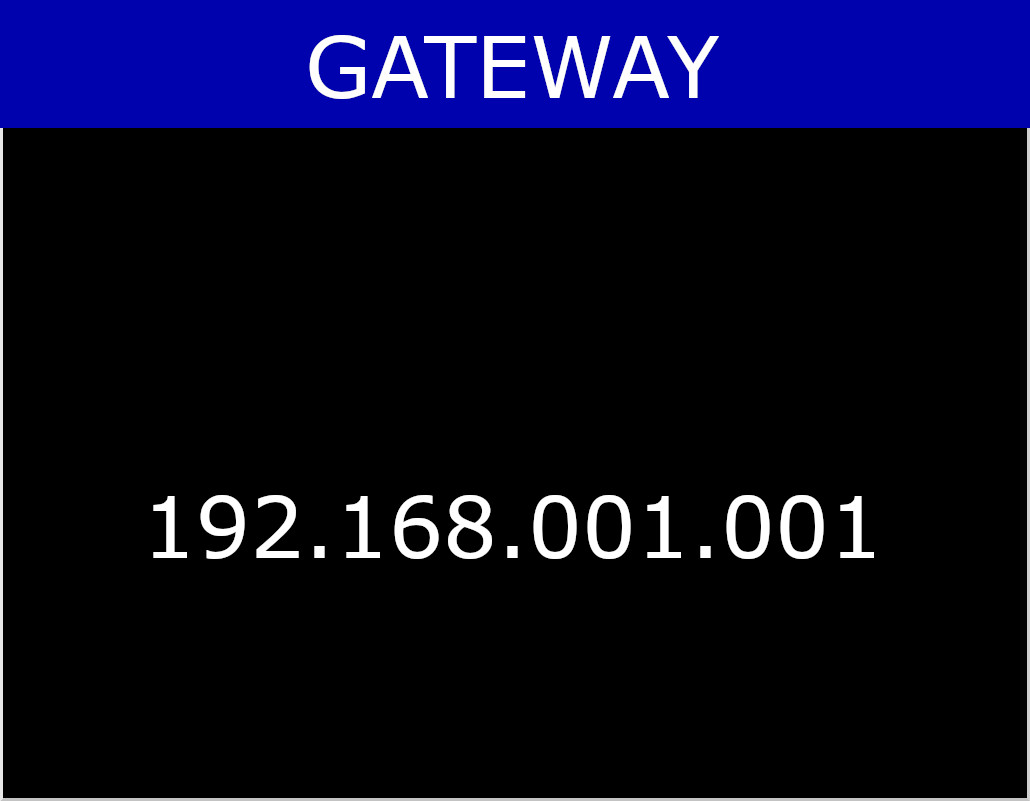 |
13 |
Enter the gateway that you wish to use and press ENTER |
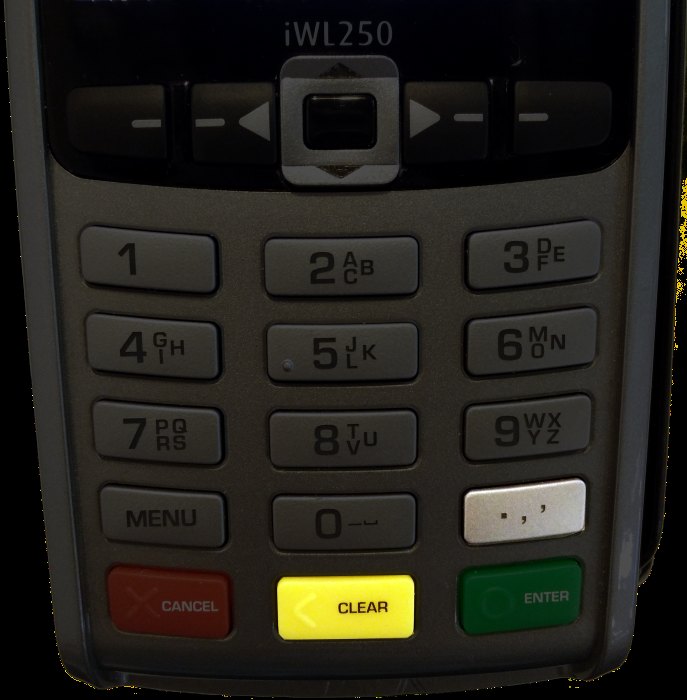 |
14 |
Restart the PDQ by holding down the .,' key and the yellow CLEAR key |
 |
15 |
If using an iWL, you may need to press the green ENTER key to turn the PDQ back on |